PTE Registration Process Online – How to Book Your PTE Exam
PTE Registration Process Online – By following these simple steps, you can book your PTE Exam. PTE Registration step by step instructions are written below. Follow them.
PTE Registration Process
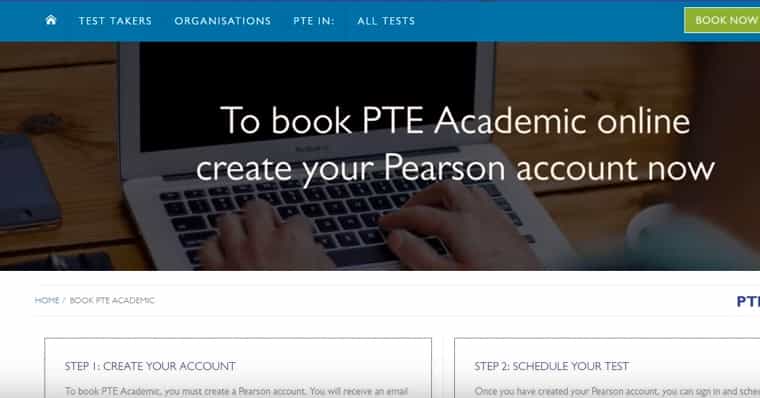
Just go to the official website of Pearson PTE.
You are now on the PTE official website which looks like this.
PTE Registration Step 1
Page 1 (Enter Personal Information)
You have to create an account first to register yourself for the PTE Academic Test. For creating an account click on “Create Your Account Now.”
The pop-up box appears mentioning the terms and conditions. Read and then Tick the box. Click the box “Yes, I agree with the policies”. Then the page looks like this –
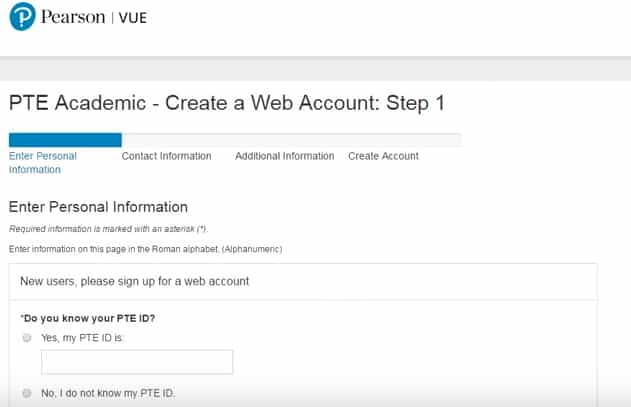
Over here, it asks you “Do you know your PTE ID?” Absolutely “No, I do not know my PTE ID” because this is the first time we are registering here. Click on the same “No, I do not know my PTE ID.”
Scroll down and fill your personal information.
First Box – “Title” – First box is of your gender like your title – “Mr, Ms, Mrs, Dr”. Remember whatever you have written here, it appears on your scorecards also. So you need to be very careful about this. Even this first gender title box is not mandatory for you to fill because there is no asterisk mark present there.
Second Box – “First Name / Given Name:” – You need to have a passport ready for you, then you fill up these details with you. Kindly have a look at your passport. On the passport, you will have your given name, so whatever is written in the Given Name of Passport, you have to enter that same given name over here. Don’t write it on your own. Your name should be similarly matched with the name on the passport, even the spelling has to be the same.
After writing Middle Name, Last Name or Surname, and Suffix.
Then fill your date of birth.
After which fill your e-mail id and confirm the same by writing once again in the lower box.
Then click on the next button.
Page 2 (Contact Information)
Select address type, country of residence from the drop-down menu and write Company name.
Write your own complete address like your door number, landmark (closeby your home/company according to your address type), Town / City, State, Pin Code.
Enter your mobile number.
Tick-mark E-mail under communication preferences to prefer communication through e-mail or if you don’t prefer to communicate through your phone.
Click next.
Page 3 – Additional Information

Enter the information like “What is your country of citizenship”, “What is your country of birth”, “What is your city of birth”, and What is your gender”.
Tick or untick according to you for PTE products or services.
Click on the next button.
Page 4 (Create Account)
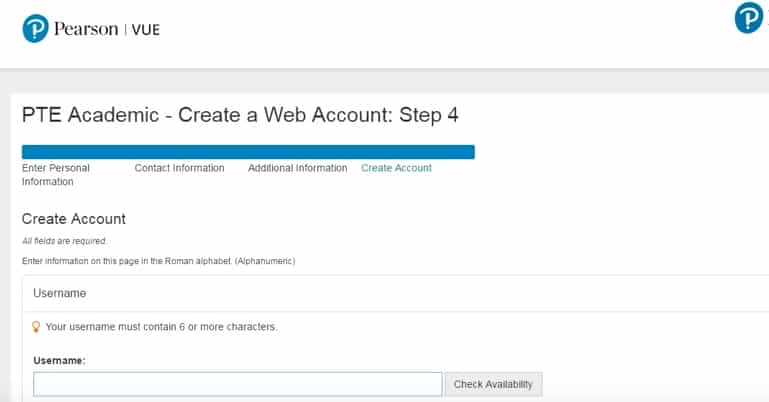
Create the username and check for the availibility. Then create a password and confirm it. Your password must contain 8 or more characters, a combination of uppercase and lowercase letters, numbers (0-9) or symbols (#, $, %, etc). Try to create a strong password and do not share your password with anyone.
If in any case, you forgot your password, then security questions will help you to retrieve the account. Fill 2 security questions and answers.
Click on the “Finish” task. Then the page looks like.
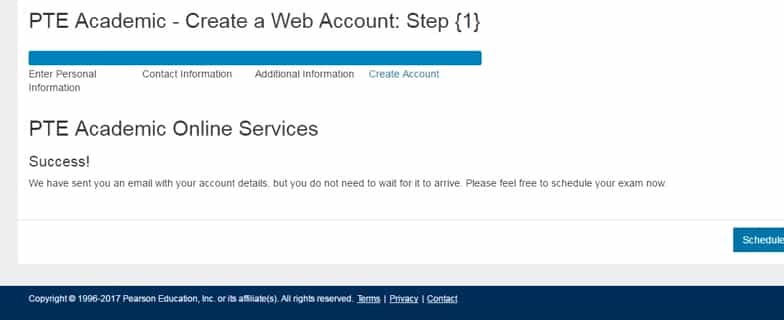
Click on the schedule button.
Tick the exam and click next on the bottom right side.
Then find the closest test center in your country, city, and state.
In the 2nd box, it displays closest test centers. Tick the test center where you wish to give your PTE Academic test. Click on the next button.
Then select a date from the 2nd box. In the third box, it shows the available appointments. Select the appointment and click on “Select Appointment”. Then click the next button.
Schedule Exam(s): Review Appointment Details
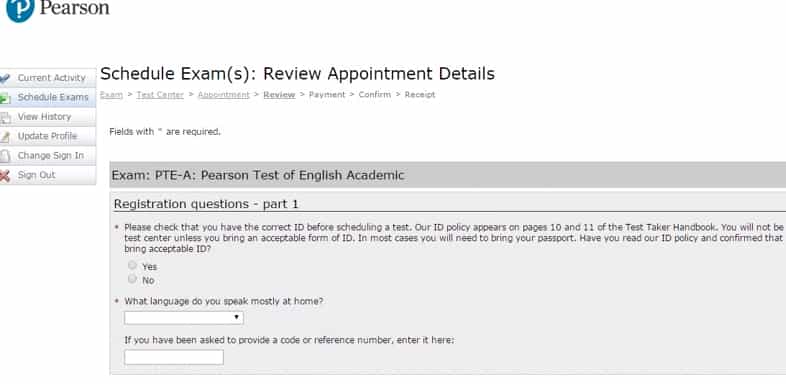
Registration Questions – Part 1
For question – “Please check that you have the correct ID before scheduling a test. Our ID policy appears on page 10 and 11 of the test taker handbook.” Click on the option Yes. For Indian students, Passport is the only valid document which is accepted as per norms. So you need to ready your original passport with you. You need to carry it with your exam center.
Select the language you speak mostly at home?
Then you have been asked to provide a code or reference number – leave it if you don’t have.
Registration Questions – Part 2
Tick first, second, third, fourth and fifth box. Answer the rest of questions as per your own because these vary from person to person. You need to fill up the details which are applicable to you.
Click on the next button.
Check the details.
In the payment section “Vouchers” – If you have vouchers then fill it in the box to get a discount. In India, it is better to buy the voucher and fill voucher number here, then you will get a discount of almost Rs 1,300.
Then click on the next button.
Check your information here and enter the credit card information. Press enter which is the final stage after which you will get the confirmation.